During the last couple of years, Chromebooks became increasingly capable devices. Today, they run a wide range of apps, including Android and even Linux applications. And, of course, Kodi is available as well. So, in case you want to run the world's most popular home theater app, let us teach you how to install Kodi on a Chromebook.

Considering the rapid development of Chrome OS, we made sure to update this guide for this year, bringing you up-to-date installation methods. However, we have an important announcement for you, so make sure to read the following segment carefully.
How to Install Kodi on a Chromebook
At the moment, there are 2 reliable ways to set up Kodi on your Chromebook, depending on your computer's model. You'll want to try the following.
Method #1: Using the Google Play Store
This method can be used by the Chromebooks that have access to the Google Play Store - which means you can install Android apps. With that said, here's how to install Kodi on a Chromebook via the Play Store.
1. Launch the Play Store app on your Chromebook.
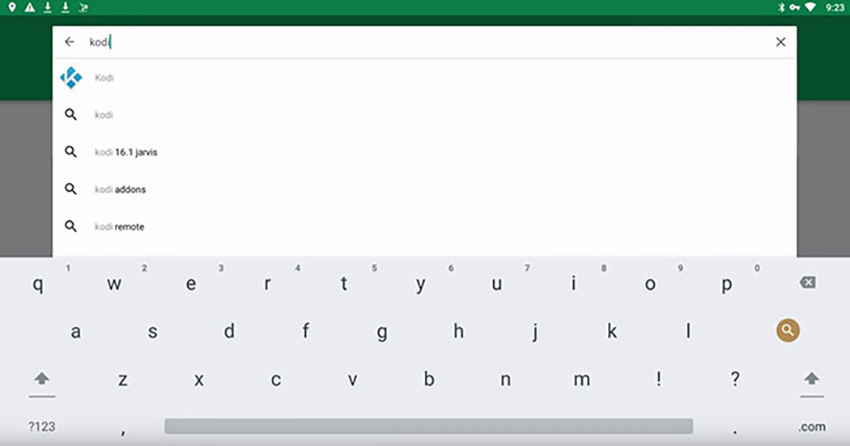
2. Select the search bar that you'll see at the top of your screen. Type in 'Kodi.'
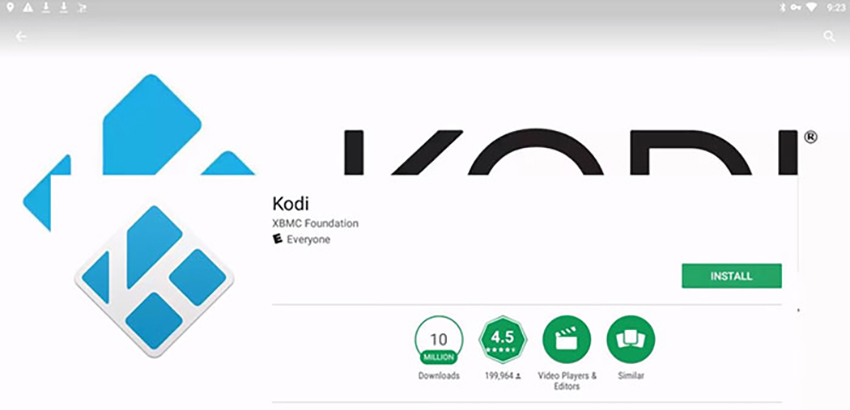
3. Find 'Kodi' on this list and click on its icon.
4. Make sure to install the official app, made by the Kodi (XBMC) Foundation.
5. Hit the green-colored 'Install' button and your Chromebook will do the rest.
6. That’s it! You should now find Kodi among the installed apps on your Chromebook.
Method #2: Run Kodi Though a Linux Emulator
A number of Chromebooks can now run Linux apps through an emulator. We're not talking about a third-party workaround here, as Linux apps can run on Chrome OS natively. So, here's how to install Kodi on Chrome OS using a Linux emulator.
1. First, make sure that your Chromebook can run Linux (here's the list of compatible devices).
2. Next, you need to turn on Linux. Navigate to Settings > Advanced > Developers.
3. Select 'Turn On' next to 'Linux Development Environment.'
4. Follow the on-screen instructions to install Linux. That should take around 10 minutes.
5. Once you're done, a Terminal window will open. That's how you'll interact with Linux.
6. Use the following command: sudo apt-get install software-properties-common.
7. Next, use this command: sudo add-apt-repository ppa:team-xbmc/ppa.
8. Once done, go with this command: sudo apt-get update.
9. And finally, to install Kodi, go with: sudo apt-get install kodi.
10. Pay attention to your computer's screen. Confirm if asked to continue.
11. That's it! Kodi should now be locally installed, so go ahead and open it.
Want to Learn More About Using Kodi?
We sincerely hope that by now you're running Kodi 19 on your Windows PC. Next, it's time to expand your knowledge by using the resources found below.
Frequently Asked Questions
If you’re new to Kodi, you may still have questions. Don’t worry though, we’ve included this section just for you.
Is Kodi legal?
Absolutely! There is nothing illegal about the application itself. But, there are some users who have figured out ways to pirate content and because Kodi is an open-source platform that allows you to install add-ons from anywhere, what you do with Kodi could be illegal.
Not only could you get into legal trouble for pirating copyright content, but your ISP can also monitor what you do with Kodi. It’s for that reason that many users opt for a VPN when using add-ons that aren’t exactly lawful.
Can I download Kodi on iOS?
Yes, but it isn’t flawless by any means. iPhone users often have difficulty with applications like Kodi because Apple takes a very ‘Big Brother’ stance on their products.
Fortunately, you can download the application from the App Store or from Kodi’s website.
More questions about Kodi? Please Read More...
.png)

